How to make the easiest cassava pancakes
16.6.22
| Recipe by Renz
These soft, tender, and fluffy cassava pancakes are a delicious alternative
pancake recipe option. They are so easy to make and are just what you need to be
a part of your breakfast or brunch.
This post contains affiliate links. Please read my full disclosure here. As an Amazon Associate, I earn from qualifying purchases.
Remember I said that we use ground provision a lot in the Caribbean? Yes, it's an integral part of our cuisine. We use them at various stages, different methods, and for all types of dishes.
We use cassava to make dumplings, as part of soups, make bread, and pone to name a few. And they also, in flour form, make some great pancakes.
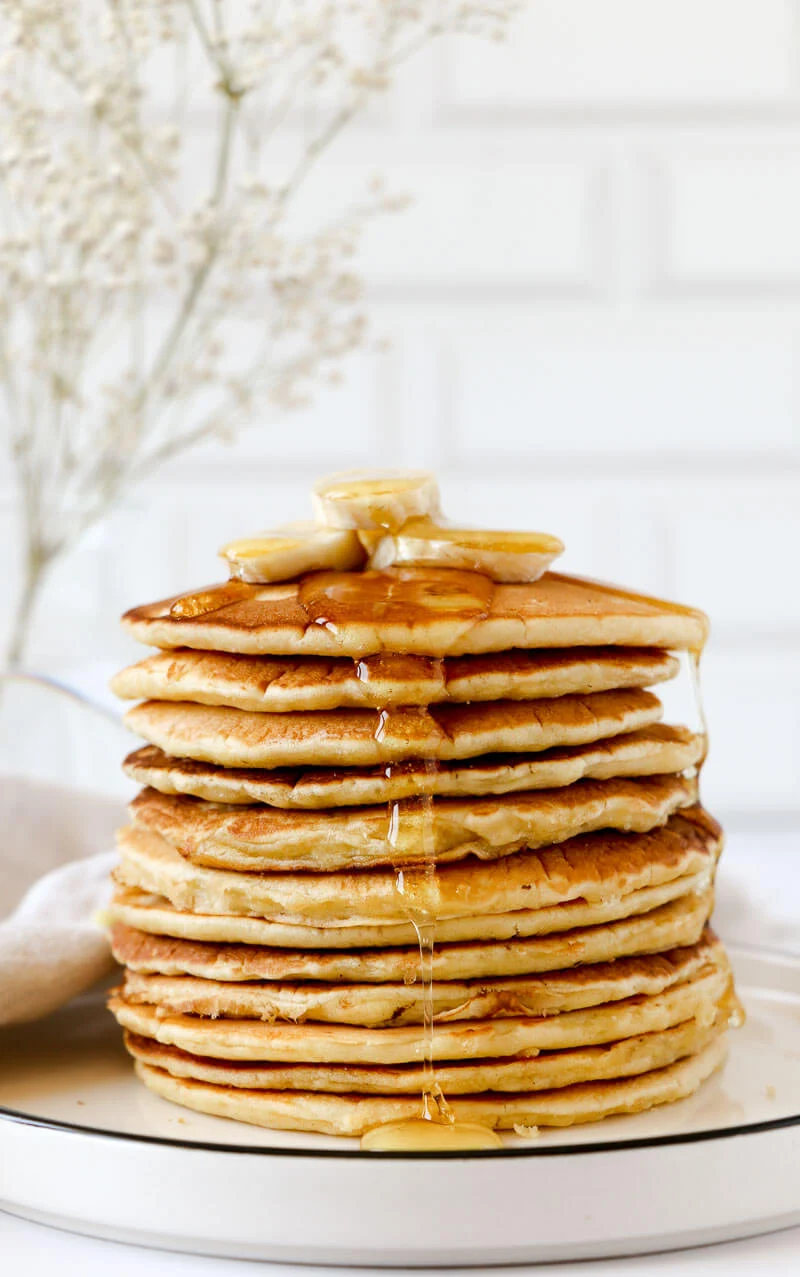
These are user-friendly cassava flour pancakes, so doesn't require you to grate any cassava. Nicely pair them with some maple syrup and topped with chopped fresh fruits like banana, mango, and papaw.
Grab a cup of some good chocolate tea, and you have a great Caribbean-inspired breakfast.
Cassava root is this tubular root starch that is not only eaten straight as a root but is also made into flour. It is also used to make drinks.
Cassava flour is made by grating this root and then putting it to dry. And can be also used to thicken stews. It is rich in Vitamin C and carbohydrates.
If you want to try to make your own cassava flour, Toned Caribbean Body has a great video.
If you need a substitute for wheat flour, then cassava flour would be the replacement. It's light in flavor, gluten-free, and low in sugar, calories, and fat.
If you want to learn more about the health benefits of cassava flour, check out this article from WebMD.
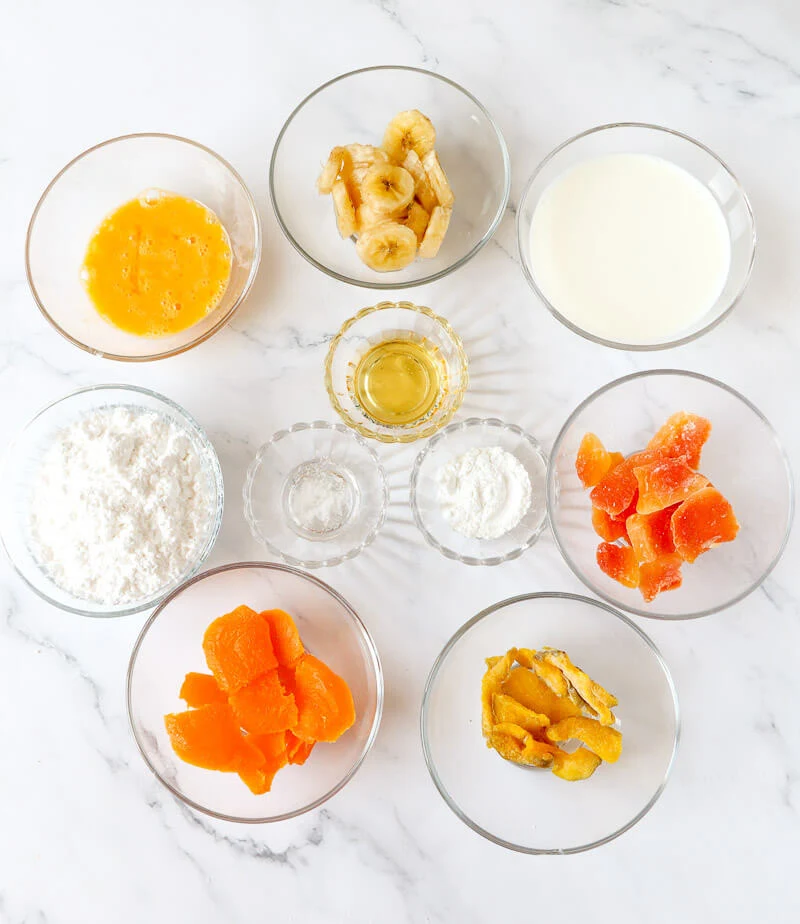
For the most part, your ingredients list contains simple ingredients, except for cassava flour. And you can easily get this now in most stores that have gluten-free sections and online from Amazon.
Equipment
Griddle | Frying pan
Spatula
This cassava flour pancake recipe is actually pretty easy to make. I did all the failing for you testing it out.
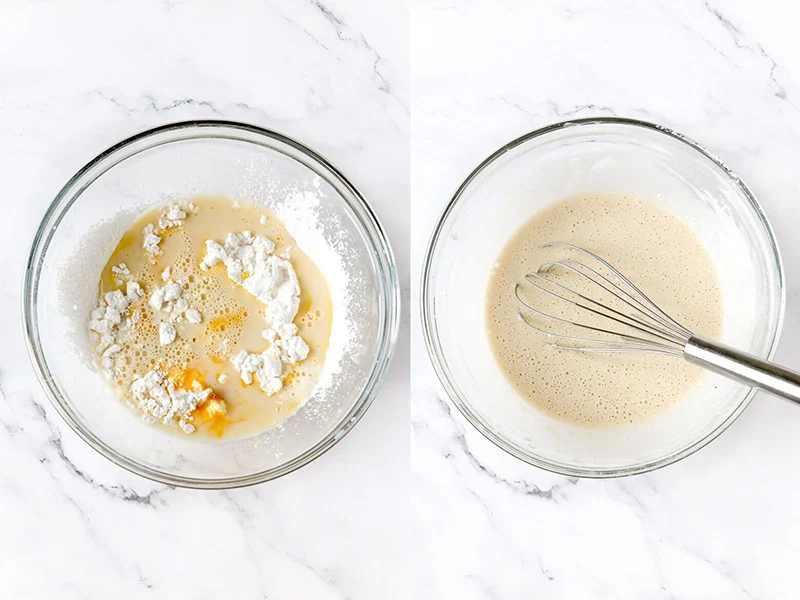
It's a simple process of mixing your dry ingredients together, then adding your wet ingredients together, then combining them both.
In a medium bowl sift together the baking powder, cassava flour, sugar, and salt.
Then beat your egg and combine the milk, egg, and essence in a separate bowl. If you want to add a little coconut oil, include it here.
Make a well in the middle of the color mixture, and add the wet mixture to it. I add half and combine then add the remaining amounts of liquid.
The pancake batter would now be ready to go. It should be thick, but able to pour.
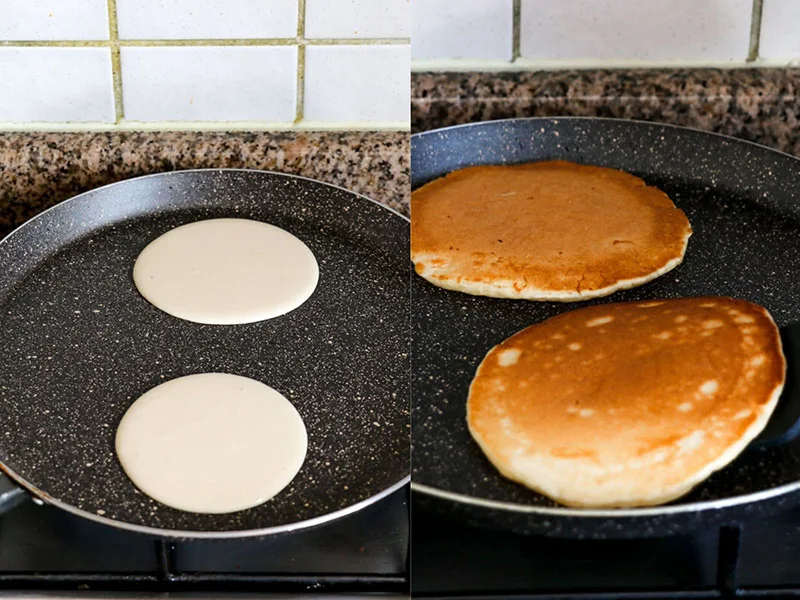
On medium-high heat, put some cooking oil lightly in your frying pan. Using about a 1/4 cup of batter, drop it onto the oil and use a spoon to spread it out a little.
I then cover my pan and let the pancake cook. When you start to see bubbles forming then you know the other side is browning.
Test with your spatula, then flip over and brown on the other side.
Continue doing this until all your batter is done and you have a layer of pancakes that are completed.
Top with your favorite toppings and syrup and serve hot.
Fresh fruits: On pancakes are a plus. And you can also use some dried ones. I love including in-season fruits that are locally available. Mangoes, bananas, paw paw (papaya) are some great island options.
Some other great options would be blackberries, or even some blueberry or strawberry compote.
Chocolate chips: Chocolate chips are good, but using dark chocolate chips are extra special addition.
Coconut flakes: Throw some sweetened coconut flakes. Better yet toast them up a little.
I have had leftovers in batter form and already made pancakes. So here are some methods to store both.
If you have leftover batter, you can keep it in the fridge. Always in a moisture prevention type container with a tight lid. This can be stored for up to two days.
When ready to use, you must make the batter get to room temperature. You would see that this batter has thickened after being in the fridge. You would need to add some water to the batter to get it back to the consistency needed.
Start by adding a tablespoon of warm water at a time and mixing till that thick but pourable batter is back.
If you have made pancakes, and there are leftovers, then you can store those in the fridge for up to two days. I always layer parchment paper between them so they don't stick to each other. Make sure to use an airtight container.
They are also good to be frozen.
To freeze, just use a freezer-safe container. I would suggest using the parchment paper mentioned above when packing the leftover pancakes.
When it's time to reheat from frozen, remove from freezer and reheat for about 30 seconds per pancake and repeat till heated through.
If you want to make sure you get some nice fluffy pancakes, here are some tips to use from my failures.
* My number one problem with my pancakes was having my stove turned up too high. I naturally put everything on high to get the pan heated quickly. But this results in a dark, burnt, pancake that most times I can't eat. THEN I lower the heat.
If you can heat up your pan on medium heat, or even a medium-low heat, probably while making the batter, or just have some patience for it to be heated then you would be good to go.
* Be careful of overmixing. When I first tested this recipe, I definitely overmixed it. This developed the gluten too much and I got some very chewy pancakes. So make sure to just combine the ingredients. You do not need to take out all the lumps. Sifting will help elevate some of them and fewer chances of getting that gummy texture.
* Do not use too much oil or even none. I LIGHTLY oil. In fact, I use my cast iron pan sometimes and don't add any oil to it. If your griddle is good then you won't need to oil.
* I used to hurry and flip my pancake and it wasn't ready yet. I realized I must heat until bubbles appear and then have them pop and then don't fill back with batter. If they pop and the batter still runs, then it's not ready. I like to put a lid on over the pan for a little till I see bubbles forming, then I flip.
This post contains affiliate links. Please read my full disclosure here. As an Amazon Associate, I earn from qualifying purchases.
Remember I said that we use ground provision a lot in the Caribbean? Yes, it's an integral part of our cuisine. We use them at various stages, different methods, and for all types of dishes.
We use cassava to make dumplings, as part of soups, make bread, and pone to name a few. And they also, in flour form, make some great pancakes.
These are user-friendly cassava flour pancakes, so doesn't require you to grate any cassava. Nicely pair them with some maple syrup and topped with chopped fresh fruits like banana, mango, and papaw.
Grab a cup of some good chocolate tea, and you have a great Caribbean-inspired breakfast.
What is cassava flour?
Cassava root is this tubular root starch that is not only eaten straight as a root but is also made into flour. It is also used to make drinks.
Cassava flour is made by grating this root and then putting it to dry. And can be also used to thicken stews. It is rich in Vitamin C and carbohydrates.
If you want to try to make your own cassava flour, Toned Caribbean Body has a great video.
If you need a substitute for wheat flour, then cassava flour would be the replacement. It's light in flavor, gluten-free, and low in sugar, calories, and fat.
If you want to learn more about the health benefits of cassava flour, check out this article from WebMD.
Ingredients for making cassava pancakes
For the most part, your ingredients list contains simple ingredients, except for cassava flour. And you can easily get this now in most stores that have gluten-free sections and online from Amazon.
- Cassava flour - I used Otto's brand cassava flour. I've also tried Bob's red mills and it was a little more tricky. Otto's worked best for me with this recipe.
- Honey
- Baking powder
- Salt
- Egg
- Whole milk
- Vanilla essence/Vanilla extract
- Fresh fruit (optional) - Ripe banana, ripe mango, papaya, dried pomelo
- Coconut oil (optional)
- Real maple syrup
Equipment
Griddle | Frying pan
Spatula
How to make cassava pancakes
This cassava flour pancake recipe is actually pretty easy to make. I did all the failing for you testing it out.
It's a simple process of mixing your dry ingredients together, then adding your wet ingredients together, then combining them both.
In a medium bowl sift together the baking powder, cassava flour, sugar, and salt.
Then beat your egg and combine the milk, egg, and essence in a separate bowl. If you want to add a little coconut oil, include it here.
Make a well in the middle of the color mixture, and add the wet mixture to it. I add half and combine then add the remaining amounts of liquid.
The pancake batter would now be ready to go. It should be thick, but able to pour.
On medium-high heat, put some cooking oil lightly in your frying pan. Using about a 1/4 cup of batter, drop it onto the oil and use a spoon to spread it out a little.
I then cover my pan and let the pancake cook. When you start to see bubbles forming then you know the other side is browning.
Test with your spatula, then flip over and brown on the other side.
Continue doing this until all your batter is done and you have a layer of pancakes that are completed.
Top with your favorite toppings and syrup and serve hot.
Different toppings for pancakes
Fresh fruits: On pancakes are a plus. And you can also use some dried ones. I love including in-season fruits that are locally available. Mangoes, bananas, paw paw (papaya) are some great island options.
Some other great options would be blackberries, or even some blueberry or strawberry compote.
Chocolate chips: Chocolate chips are good, but using dark chocolate chips are extra special addition.
Coconut flakes: Throw some sweetened coconut flakes. Better yet toast them up a little.
How to store and reheat pancakes?
I have had leftovers in batter form and already made pancakes. So here are some methods to store both.
Leftover pancake batter:
If you have leftover batter, you can keep it in the fridge. Always in a moisture prevention type container with a tight lid. This can be stored for up to two days.
When ready to use, you must make the batter get to room temperature. You would see that this batter has thickened after being in the fridge. You would need to add some water to the batter to get it back to the consistency needed.
Start by adding a tablespoon of warm water at a time and mixing till that thick but pourable batter is back.
Leftover pancakes:
If you have made pancakes, and there are leftovers, then you can store those in the fridge for up to two days. I always layer parchment paper between them so they don't stick to each other. Make sure to use an airtight container.
They are also good to be frozen.
To freeze, just use a freezer-safe container. I would suggest using the parchment paper mentioned above when packing the leftover pancakes.
When it's time to reheat from frozen, remove from freezer and reheat for about 30 seconds per pancake and repeat till heated through.
Tips for making pancakes
If you want to make sure you get some nice fluffy pancakes, here are some tips to use from my failures.
* My number one problem with my pancakes was having my stove turned up too high. I naturally put everything on high to get the pan heated quickly. But this results in a dark, burnt, pancake that most times I can't eat. THEN I lower the heat.
If you can heat up your pan on medium heat, or even a medium-low heat, probably while making the batter, or just have some patience for it to be heated then you would be good to go.
* Be careful of overmixing. When I first tested this recipe, I definitely overmixed it. This developed the gluten too much and I got some very chewy pancakes. So make sure to just combine the ingredients. You do not need to take out all the lumps. Sifting will help elevate some of them and fewer chances of getting that gummy texture.
* Do not use too much oil or even none. I LIGHTLY oil. In fact, I use my cast iron pan sometimes and don't add any oil to it. If your griddle is good then you won't need to oil.
* I used to hurry and flip my pancake and it wasn't ready yet. I realized I must heat until bubbles appear and then have them pop and then don't fill back with batter. If they pop and the batter still runs, then it's not ready. I like to put a lid on over the pan for a little till I see bubbles forming, then I flip.






Comments
Post a Comment