Rock buns - Caribbean style
14.7.23
| Recipe by Renz
Rock buns are a sweet treat, beloved for their crumbly texture and rich flavor.
Like British scones, this baked good is made with simple ingredients and often
incorporates, raisins, candied mixed peel, and even mixed spices.
This dessert is a favorite in many Caribbean households and is enjoyed both locally and around the world. Like coconut drops, it's easy to see why it is a favorite, as the recipe is easy to follow and requires no fuss. In fact, the dough can be made in just one bowl with no tools required.
Whether you're looking for a new treat to try or simply want to satisfy your sweet tooth, give this recipe for rock buns (also known as rock cakes) a try. Their unique combination of ingredients and buttery texture is sure to please.
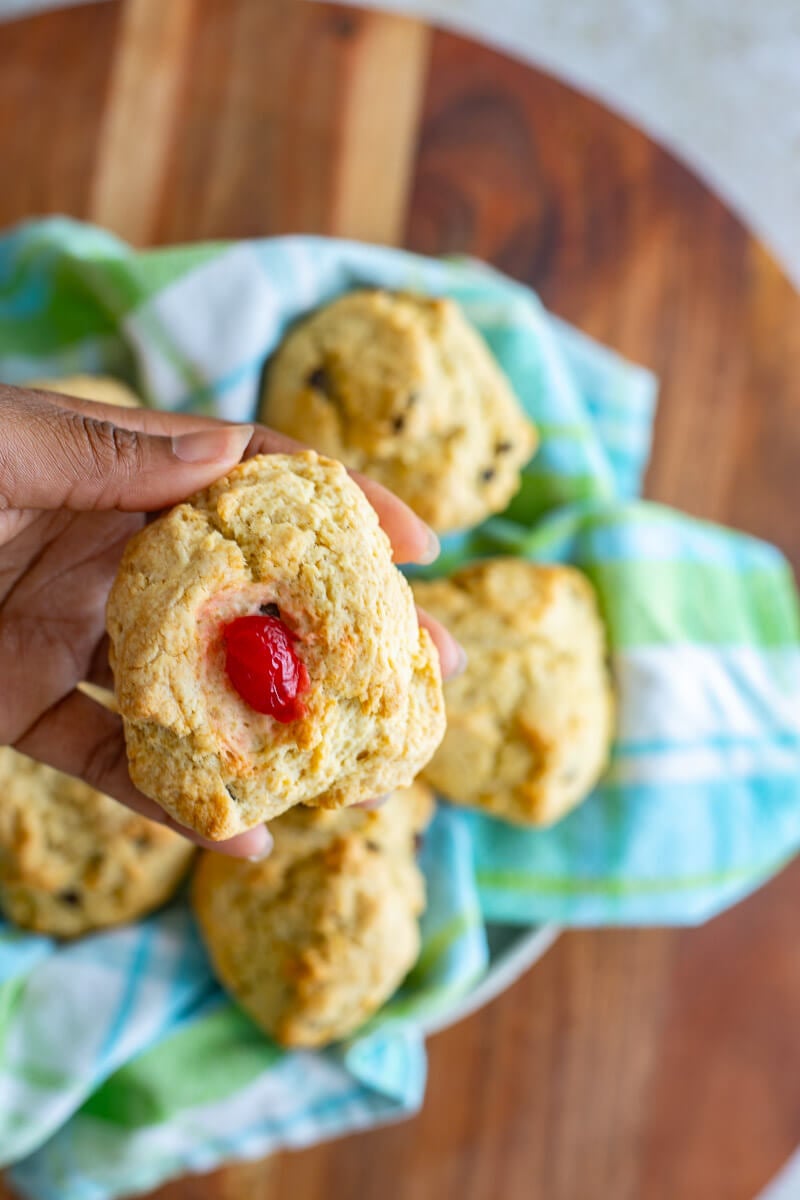
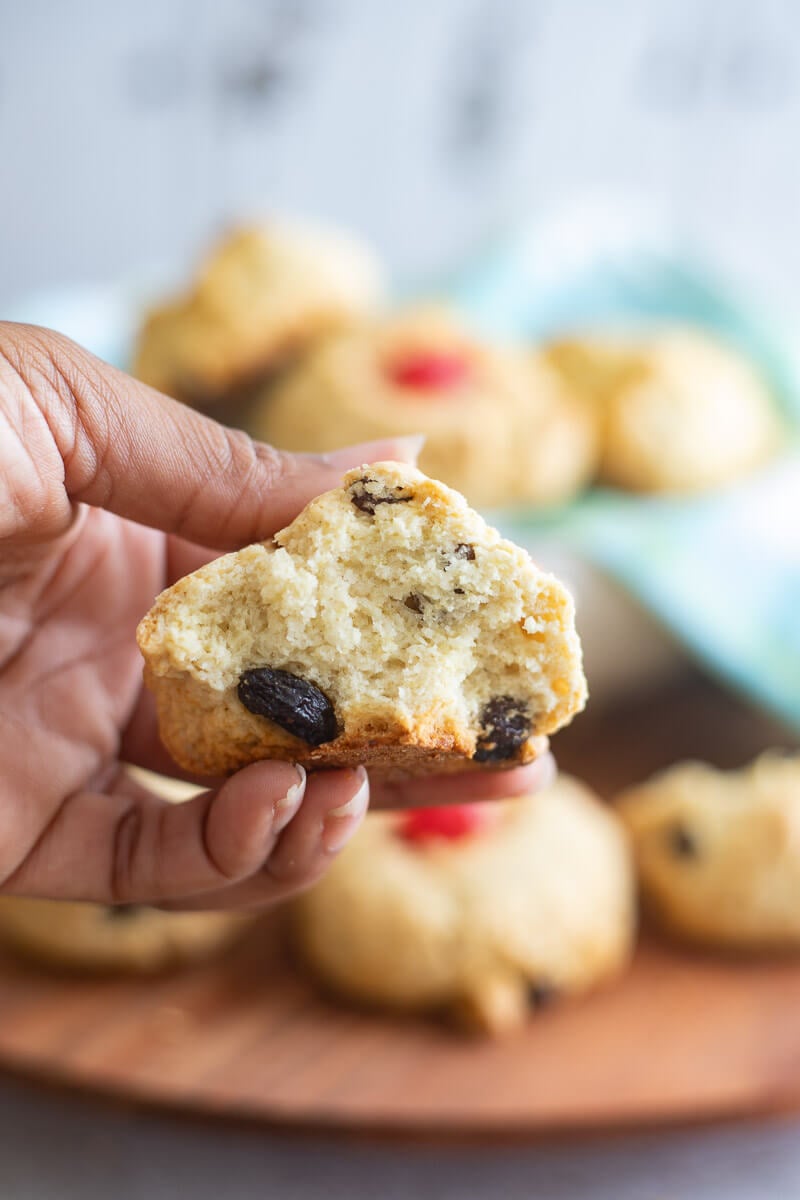
These are some little snack cakes that are usually round in the shape of a rock. The texture is very similar to that of scones.
Don't let the recipe's name make you think these will be tough to eat. Actually, the name is more to do with how they look. This is because they have a pebbly-looking surface. They also last quite a while once stored properly, so are perfect for batch cooking.
So if you like the sound of these rock buns, then here is everything you need to know to make them at home.
Overall, the appeal of rock cake lies in its simplicity in both preparation and ingredients involved. They make for a perfect addition to any tea party and a great snack on the go.
First of all, it is a good idea to ensure that you can get all of the ingredients together. Focusing on this first means that the cooking process will be simple. You will need:
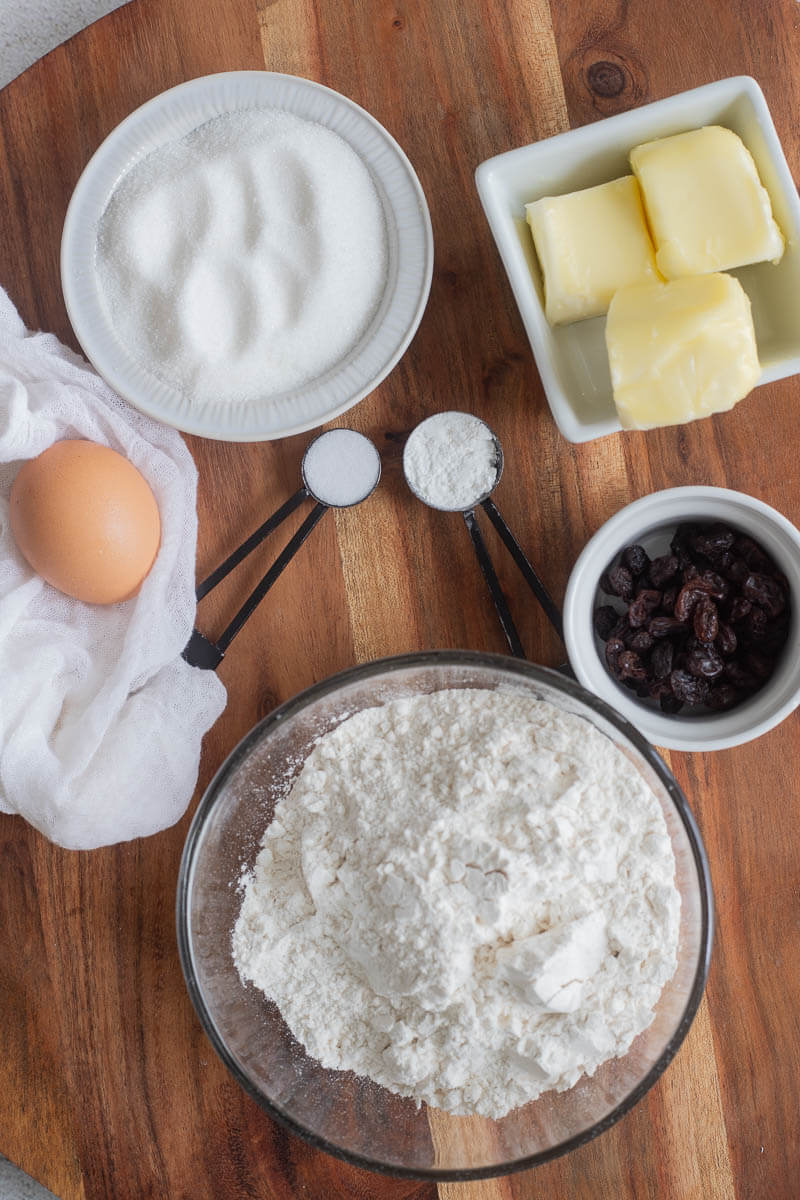
Rock buns, also known as rock cakes, are a delightful and easy-to-make sweet treat that is perfect for any occasion. Made with simple ingredients, you can easily whip up a batch of these crumbly and delicious buns in no time. Follow these step-by-step instructions to recreate this classic recipe for rock buns.
1. Preheat your oven to 350°F. Prepare your baking tray or cookie sheet with some parchment paper or grease it so that the rock buns don’t stick when baking.
2. Using the rub-in method, rub the butter into the flour until you have clumps. It will look like crumbles when properly combined.
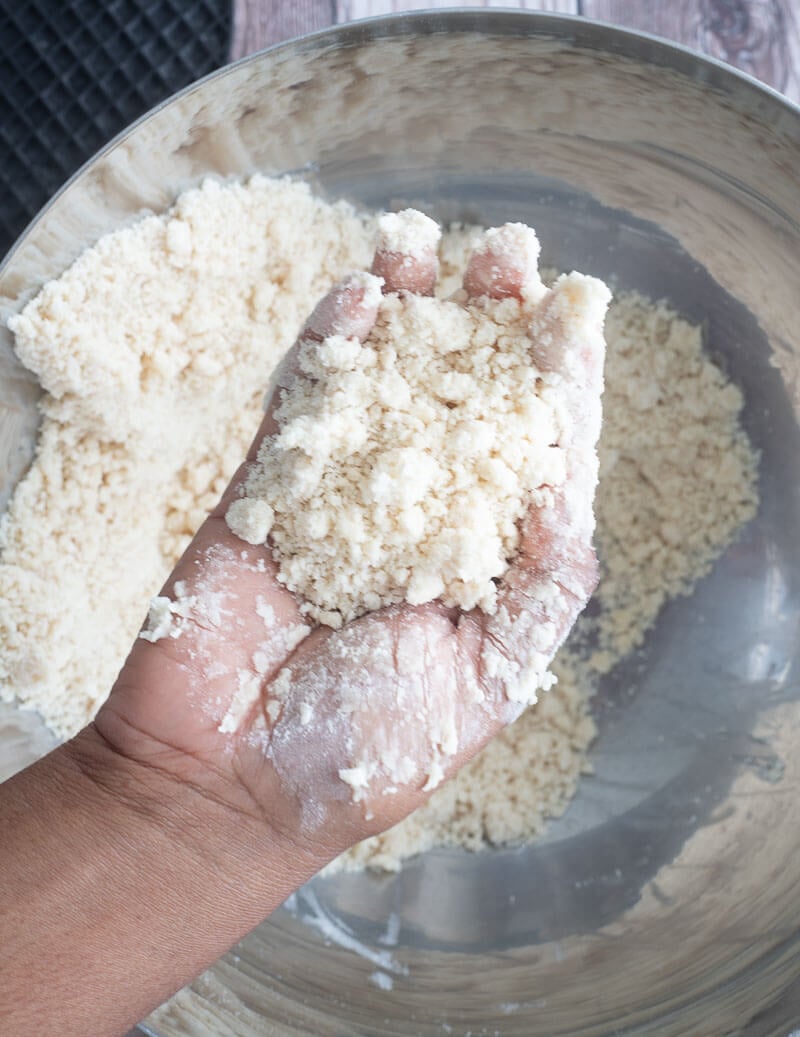
3. Once those two ingredients have combined, add in the remaining dry ingredients: your baking powder, spices, and sugar, and combine.
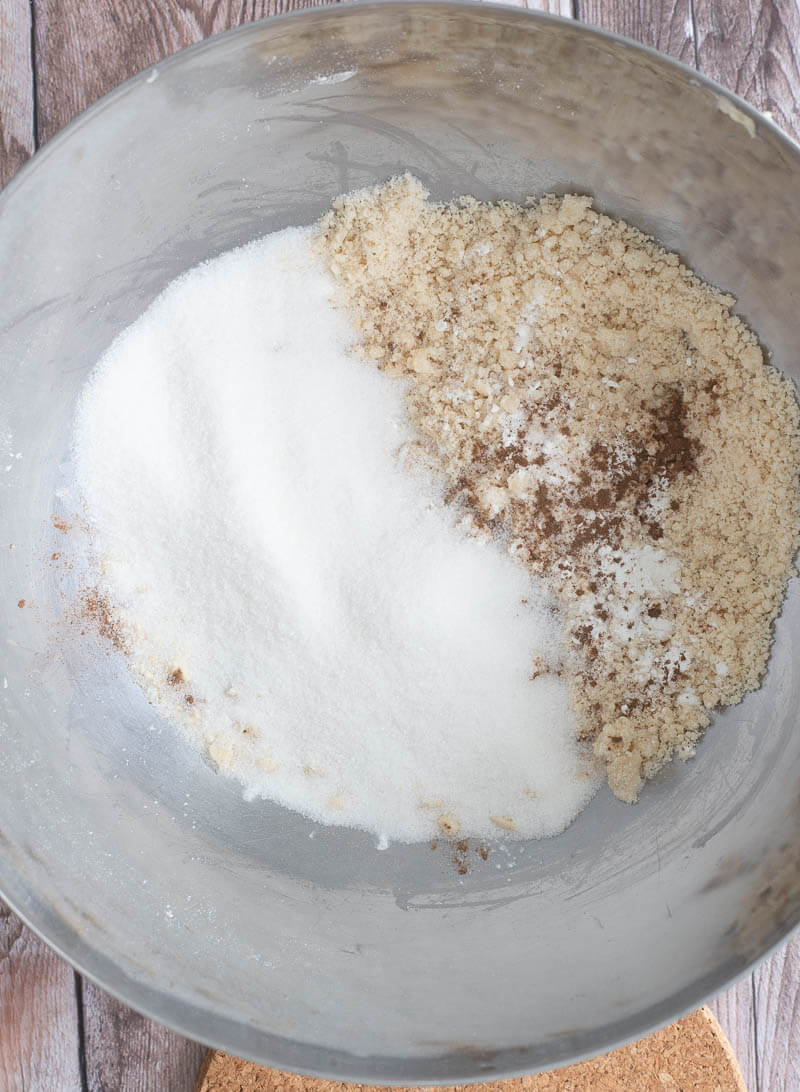
4. In a small bowl, add the egg and milk and beat slightly. Then add the egg mixture to the flour mixture.
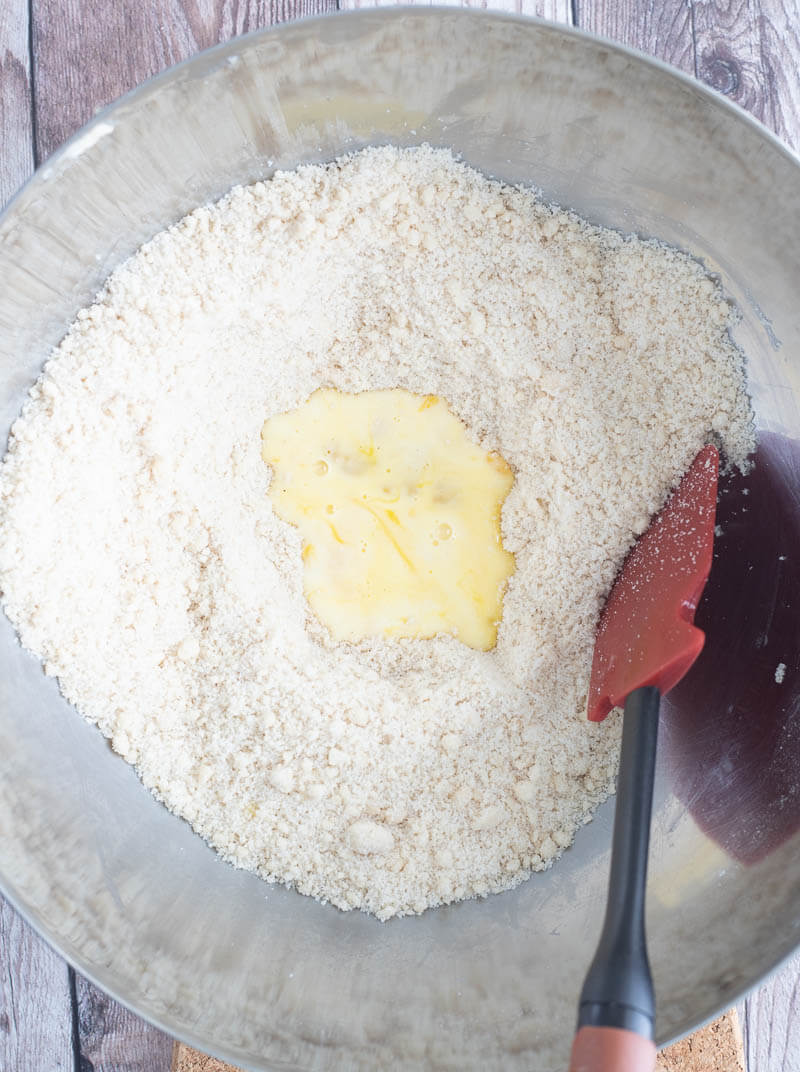
5. As the mixture starts to come together, add in your raisins and/or mixed peel.
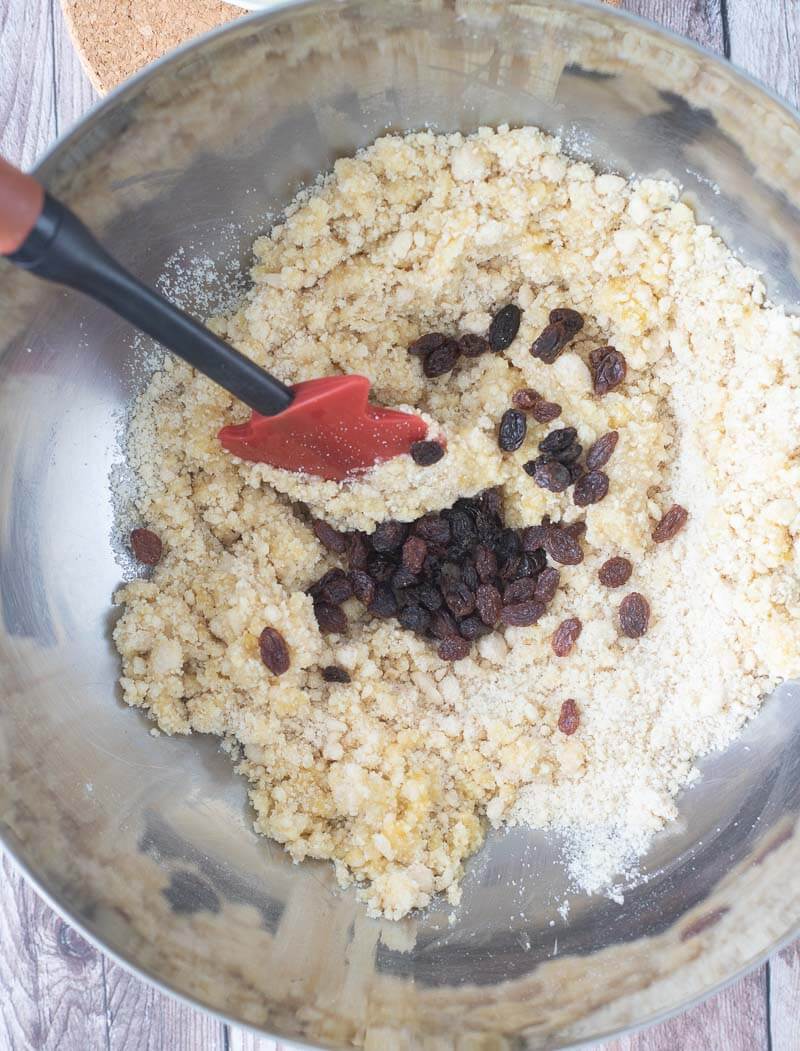
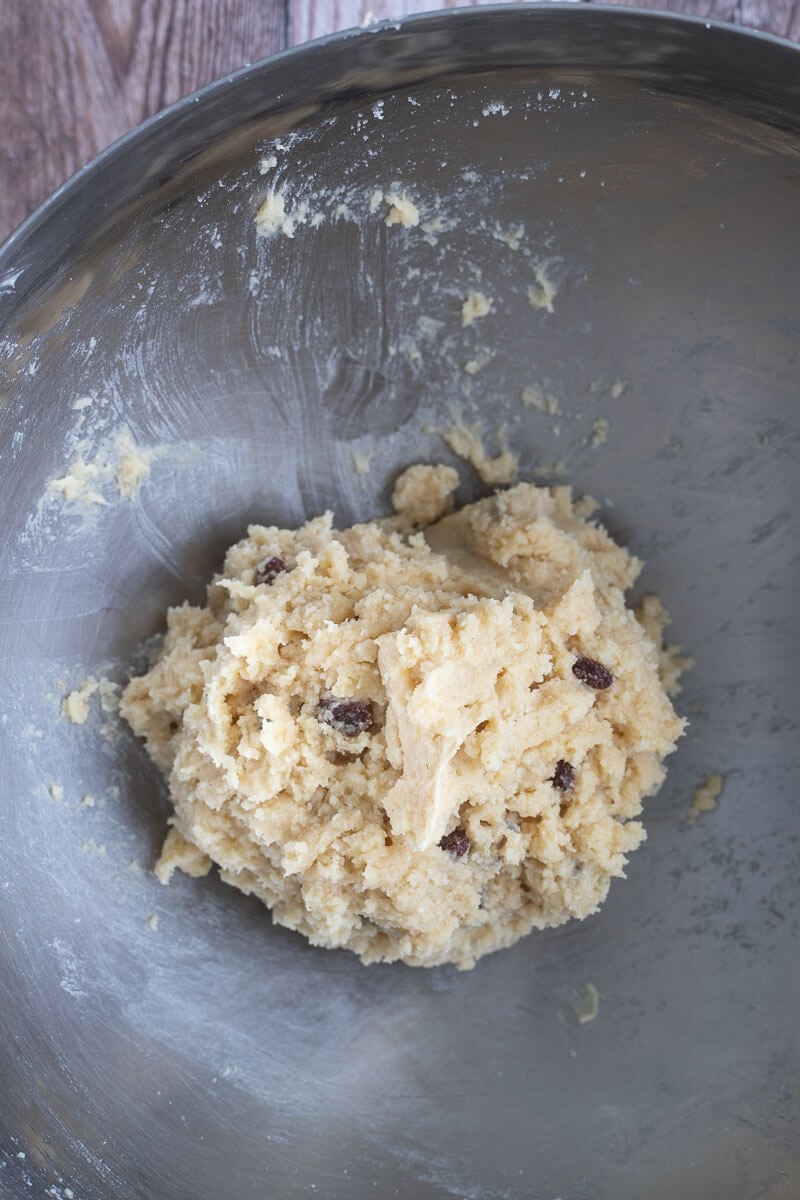
6. Mix until you get a dough ball with all the mixture combined until you get a nice smooth ball. It will be a stiff dough.
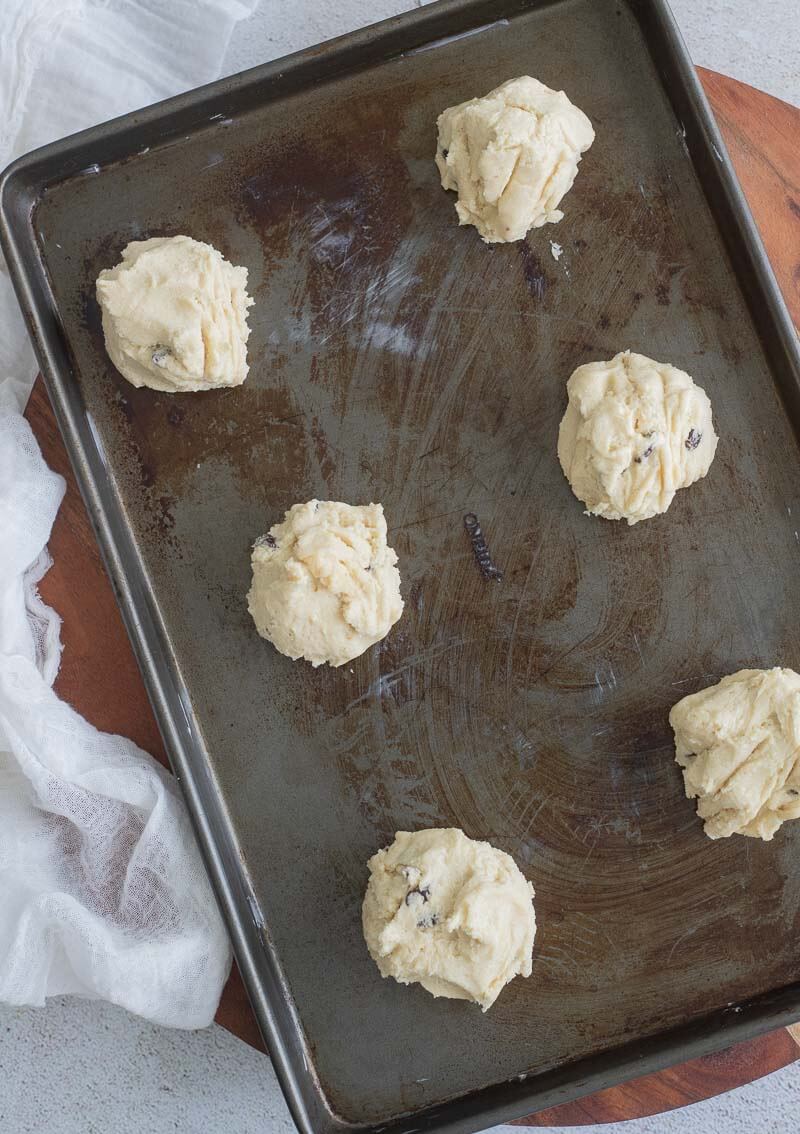
7. Scoop out a spoonful of the mixture and shape them into molds of dough. Place them on the prepared baking tray, leaving enough space between them for expansion. If you want to use cherries in the middle, you would insert half of a maraschino cherry on the top.
8. Bake for 20-25 minutes or until they turn golden brown in color. Check if they're cooked by inserting a toothpick in the center - if it comes out clean, they're done.
9. Remove the rock buns from the oven and place them on a wire rack to cool down.
When it comes to any recipe, it is always a good idea to understand what notes and tips you can use to help you fully utilize the recipe and have success each and every time. If you want to make the most out of these delicious rock buns then here are some recipe notes and tips to help.
Like with many recipes, once you have tried them out a few times you can look to make some changes and vary the recipe to suit your tastes and preferences. So I wanted to share with you some of them that you might want to try.
Like with any recipe, there are often questions that need answering. I thought I would share some of the common questions here, but if you have any comments or questions please don’t hesitate to contact me directly.
You can enjoy these rock buns as they are, or slice them in half and serve them much like you would a scone with some butter, cream, or a preservative like strawberry jam.
The rock buns last a long time when stored correctly.
Once you've baked your delicious buns, it's important to store them properly to keep them fresh for longer periods. If you're planning on enjoying them within the next day or two, simply leave them out on the counter in a cool, dry place. However, if you want to keep your rock buns fresh for up to three days, there are a few tips to follow.
Once cooled from the oven, firstly, wrap your buns in foil or transfer them to an airtight container and store them at room temperature. They will be at their best for up to a week. This will prevent them from drying out and help to maintain their texture and flavor. You can also sprinkle a little bit of sugar over the top of the buns before wrapping them to help to keep them moist.
If you have leftovers, and don't plan on eating them within the next few days, freezing them is a great option. To do so, simply wrap them in foil and place them in a zipper-topped freezer bag. They can be stored in the freezer for up to three months.
When you're ready to eat your frozen ones, you can either defrost them in the fridge overnight or reheat them in a low oven until they're warmed through. Freezing your rock buns is a great way to enjoy them at a later time and ensures that none of your delicious treats go to waste.
Remember, proper storage is the perfect way to make sure you properly to get the most out of your sweet treat!
You can make the rock buns gluten-free by using your preferred gluten-free flour. This is an easy recipe to make as part of a gluten-free diet.
Rock buns are a delightful treat that brings together the flavors of the Caribbean with a touch of British influence. Their crumbly texture, rich flavor, and simplicity in preparation make them a beloved favorite for tea parties, snacks, or whenever you're craving something sweet.
Whether you enjoy them as they are or even with a spread of butter and jam, these rock buns are sure to satisfy your taste buds. So why not give this recipe a try and experience the joy of baking these delicious treats in your own kitchen?
We hope you enjoy making and savoring every bite of these delightful treats.
This dessert is a favorite in many Caribbean households and is enjoyed both locally and around the world. Like coconut drops, it's easy to see why it is a favorite, as the recipe is easy to follow and requires no fuss. In fact, the dough can be made in just one bowl with no tools required.
Whether you're looking for a new treat to try or simply want to satisfy your sweet tooth, give this recipe for rock buns (also known as rock cakes) a try. Their unique combination of ingredients and buttery texture is sure to please.
What are rock buns?
These are some little snack cakes that are usually round in the shape of a rock. The texture is very similar to that of scones.
Don't let the recipe's name make you think these will be tough to eat. Actually, the name is more to do with how they look. This is because they have a pebbly-looking surface. They also last quite a while once stored properly, so are perfect for batch cooking.
So if you like the sound of these rock buns, then here is everything you need to know to make them at home.
Overall, the appeal of rock cake lies in its simplicity in both preparation and ingredients involved. They make for a perfect addition to any tea party and a great snack on the go.
Ingredients for rock buns
First of all, it is a good idea to ensure that you can get all of the ingredients together. Focusing on this first means that the cooking process will be simple. You will need:
- All-purpose flour
- Sugar
- Baking powder
- Margarine
- Salt
- Milk
- Egg
- Raisins Or mixed peel or a mix of both
- Allspice
- Maraschino cherries (optional)
How to make the rock buns
Rock buns, also known as rock cakes, are a delightful and easy-to-make sweet treat that is perfect for any occasion. Made with simple ingredients, you can easily whip up a batch of these crumbly and delicious buns in no time. Follow these step-by-step instructions to recreate this classic recipe for rock buns.
1. Preheat your oven to 350°F. Prepare your baking tray or cookie sheet with some parchment paper or grease it so that the rock buns don’t stick when baking.
2. Using the rub-in method, rub the butter into the flour until you have clumps. It will look like crumbles when properly combined.
3. Once those two ingredients have combined, add in the remaining dry ingredients: your baking powder, spices, and sugar, and combine.
4. In a small bowl, add the egg and milk and beat slightly. Then add the egg mixture to the flour mixture.
5. As the mixture starts to come together, add in your raisins and/or mixed peel.
6. Mix until you get a dough ball with all the mixture combined until you get a nice smooth ball. It will be a stiff dough.
7. Scoop out a spoonful of the mixture and shape them into molds of dough. Place them on the prepared baking tray, leaving enough space between them for expansion. If you want to use cherries in the middle, you would insert half of a maraschino cherry on the top.
8. Bake for 20-25 minutes or until they turn golden brown in color. Check if they're cooked by inserting a toothpick in the center - if it comes out clean, they're done.
9. Remove the rock buns from the oven and place them on a wire rack to cool down.
Recipe notes and tips
When it comes to any recipe, it is always a good idea to understand what notes and tips you can use to help you fully utilize the recipe and have success each and every time. If you want to make the most out of these delicious rock buns then here are some recipe notes and tips to help.
-
Cut the butter into cubes before adding it to the flour. When rubbing it in,
use your fingertips and thumb and rub them together while simultaneously
lifting your hand above the surface. We are trying to not let the butter get
hot on our hands.
- Shake the bowl occasionally in between rubbing to bring clumps to the top so then you can rub those in.
- I prefer to use a butter stick or butter from the tub to spread on the baking sheet versus using baking spray. It gives a heavier coat and reduces the chances of sticking.
- Try your best to combine all of the ingredients together and ensure that the raisins are evenly distributed within the mixture.
- The mixture shouldn't be too sticky. If you find it sticky on your hands, then add a little flour to the mixture. You want the dough combined and holding together and not sticking to your hands. We want it to hold the shape as it bakes and not spread out.
- A cookie scoop will help you to portion out individual rock buns if you want them to look perfect. I prefer to do them by hand and make it into rough heaps.
Variations to try
Like with many recipes, once you have tried them out a few times you can look to make some changes and vary the recipe to suit your tastes and preferences. So I wanted to share with you some of them that you might want to try.
- You can use other dried fruit along with the raisins or substitute for other options. Mixed peel, dried cranberries, dried apricot, and even dried bananas will all work well and taste great.
- Add chocolate chips instead of raisins to make chocolate chip rock cakes for a different flavor.
FAQs
Like with any recipe, there are often questions that need answering. I thought I would share some of the common questions here, but if you have any comments or questions please don’t hesitate to contact me directly.
How should I serve the rock buns?
You can enjoy these rock buns as they are, or slice them in half and serve them much like you would a scone with some butter, cream, or a preservative like strawberry jam.
How do I store the rock buns?
The rock buns last a long time when stored correctly.
Once you've baked your delicious buns, it's important to store them properly to keep them fresh for longer periods. If you're planning on enjoying them within the next day or two, simply leave them out on the counter in a cool, dry place. However, if you want to keep your rock buns fresh for up to three days, there are a few tips to follow.
Once cooled from the oven, firstly, wrap your buns in foil or transfer them to an airtight container and store them at room temperature. They will be at their best for up to a week. This will prevent them from drying out and help to maintain their texture and flavor. You can also sprinkle a little bit of sugar over the top of the buns before wrapping them to help to keep them moist.
If you have leftovers, and don't plan on eating them within the next few days, freezing them is a great option. To do so, simply wrap them in foil and place them in a zipper-topped freezer bag. They can be stored in the freezer for up to three months.
When you're ready to eat your frozen ones, you can either defrost them in the fridge overnight or reheat them in a low oven until they're warmed through. Freezing your rock buns is a great way to enjoy them at a later time and ensures that none of your delicious treats go to waste.
Remember, proper storage is the perfect way to make sure you properly to get the most out of your sweet treat!
How would you make the rock buns gluten-free?
You can make the rock buns gluten-free by using your preferred gluten-free flour. This is an easy recipe to make as part of a gluten-free diet.
Rock buns are a delightful treat that brings together the flavors of the Caribbean with a touch of British influence. Their crumbly texture, rich flavor, and simplicity in preparation make them a beloved favorite for tea parties, snacks, or whenever you're craving something sweet.
Whether you enjoy them as they are or even with a spread of butter and jam, these rock buns are sure to satisfy your taste buds. So why not give this recipe a try and experience the joy of baking these delicious treats in your own kitchen?
We hope you enjoy making and savoring every bite of these delightful treats.
Here are some more Caribbean treats:
- Jamaican gizzada
- Trinidad coconut tart
- Trinidad coconut sweet bread
- Marble sponge cake
- Trinidad currants roll
- Jamaican bread pudding
Comments
Post a Comment