
How to Make Trinidad Coconut Tart
A delectable pastry dough pocket filled with sweetened shredded coconut and “stewed” with additional spices like cinnamon, nutmeg, and ginger. Trinidad coconut tart is a beloved Caribbean snack, a golden pastry pocket filled with sweet, spiced coconut that hits every nostalgic note.
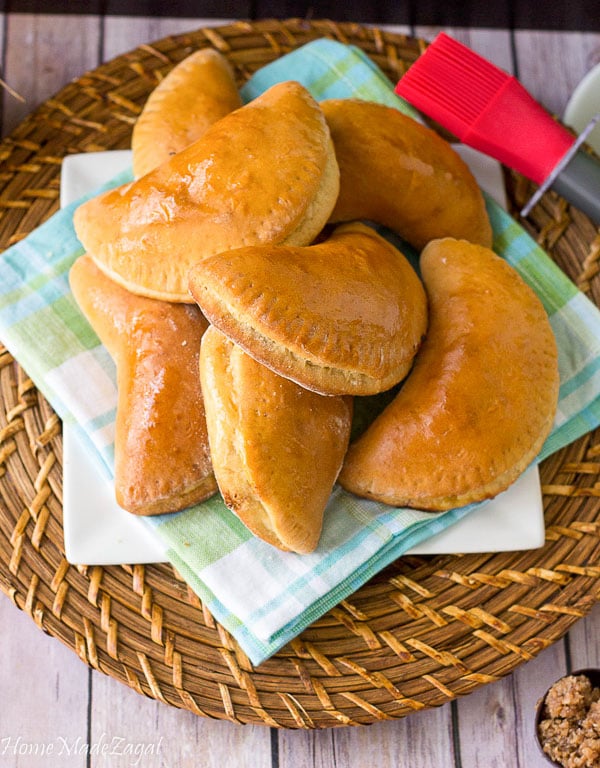
Trinidad coconut tart is one of those pastries that instantly makes you feel at home. A golden, flaky crust filled with sweetened coconut that’s simmered down with spices like cinnamon, nutmeg, and ginger — it’s the kind of snack that shows up at Saturday baking sessions and vanishes before the tray even cools.
In this post, we’re getting into how to make this beloved Caribbean treat from scratch, just like my aunt did back in the day, flour-covered from head to toe, churning out tarts in batches.
What is Trinidad-style coconut tart?
Trinidad coconut tart is a sweet hand pie-style pastry made with soft dough and a spiced coconut filling. While it may remind some of the Jamaican gizzada, our Trini version is fully enclosed; the coconut is tucked inside, not piled on top.
Similar coconut-filled tarts are also made throughout the Caribbean. Bahamian coconut tart is traditionally made as a larger tart with coconut filling layered between the dough, although individual versions can also be found.
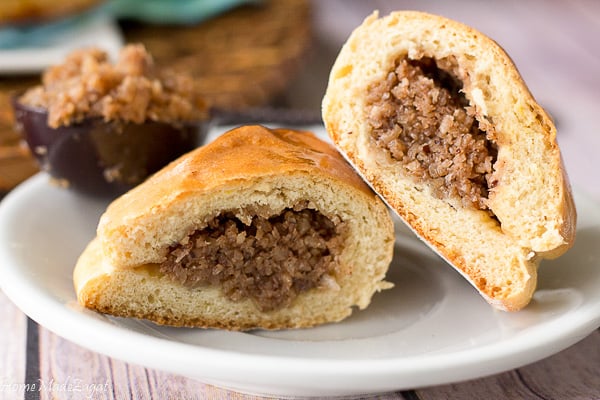
The filling is made with shredded coconut, sugar, cinnamon, nutmeg, ginger, and bay leaf, all cooked together until the coconut is tender and flavorful. Everything gets wrapped in soft, slightly sweet dough and baked until golden. It’s a staple in local bakeries, and even more nostalgic when made at home.
How to make Trini coconut tart
Ingredients
This recipe uses simple pantry ingredients, but it’s the coconut that takes center stage. Here’s what you’ll need and why each one matters:
- Coconut
Fresh dry coconut is the gold standard here. Once you crack it open and shred the meat, the flavor is unmatched. If fresh isn’t an option (we’ve all been there), use unsweetened desiccated coconut, just give it a quick blitz in the food processor and a splash of water while cooking to soften it up.
- Sugar
I use brown sugar because it gives the filling a deeper, almost caramel-like flavor. Granulated sugar will still work, but brown sugar brings that extra something.
- Spices
A good mix of cinnamon, nutmeg, and a touch of ginger really brings warmth and depth to the filling. You can use fresh grated ginger or powdered — both work, but fresh adds a little zing.
- Flour & Fat
All-purpose flour is your base for the dough — stick with that and avoid cake or self-rising flour. For fat, I use Crisco or shortening to get that tender, flaky texture. Butter can work too, but the texture may be a bit different.
- Yeast & Sugar (for the dough)
This dough has a soft, slightly risen texture thanks to a touch of yeast and sugar. It’s not puff pastry, it’s better. A little rest time is all it needs to come together beautifully.
The full list of ingredients and quantities is listed in the recipe card below.
Instructions
Making this treat is a two-part process: first, the filling, then the dough, and finally, you bring them together in sweet coconut harmony. Let’s break it down so you’re never overwhelmed.
Make the coconut filling
- Prep the coconut: If you’re using a fresh coconut (yes, you’re doing the most and we love that), crack it open, remove the meat, and rinse it well. Cut into smaller chunks and shred them in a food processor.
Using packaged coconut? Give it a few pulses in the processor to break down those long strands. - Cook the filling: In a pot over medium heat, combine the shredded coconut with sugar, cinnamon, nutmeg, ginger, vanilla, and a bay leaf. Cook for about 15 minutes, stirring throughout, until the coconut is tender and the filling is no longer wet.
If you’re using packaged coconut, add a small splash of water at the beginning to help soften the coconut as it cooks.
Note: If you’re using pre-packaged coconut, add a splash of water to help rehydrate it.
Make the dough
- Mix the dry ingredients: In a large bowl, combine flour, sugar, and yeast.
- Add fat and water: Cut in your Crisco (or shortening) and rub it into the flour until the texture is crumbly. Slowly add water until the dough comes together smoothly, soft but not sticky.
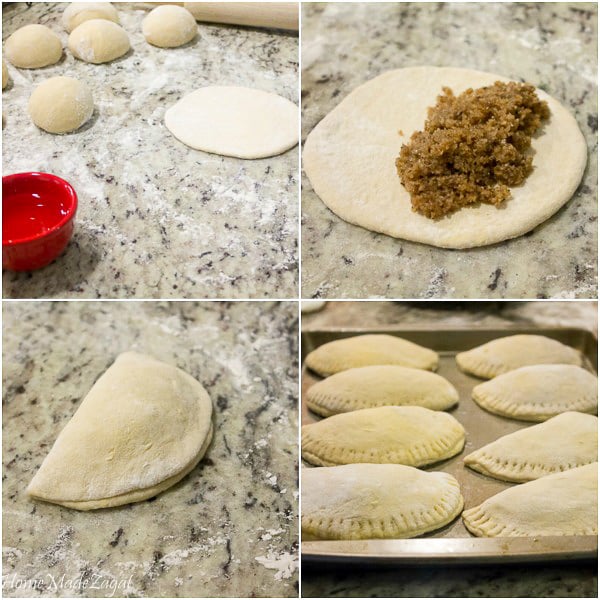
- Let it rest: Then cover the dough with plastic wrap or a clean towel and let it rest for 30 minutes. After that, divide the dough into about 16 small balls, then let those rest again for another 20 minutes under a damp towel. This helps them roll out nicely.
Fill, seal, and bake
- Preheat the oven: Set your oven to 350°F. Lightly grease your baking sheet.
- Fill the tarts: Roll out each dough ball on a floured surface to form a circle. Place about 2 tablespoons of coconut filling on one side of the circle. Dampen the edges with water, then fold over and press to seal. Use a fork to crimp the edges. Pretty and practical.
- Bake: Arrange your sealed tarts on the baking sheet and bake for 20 minutes.
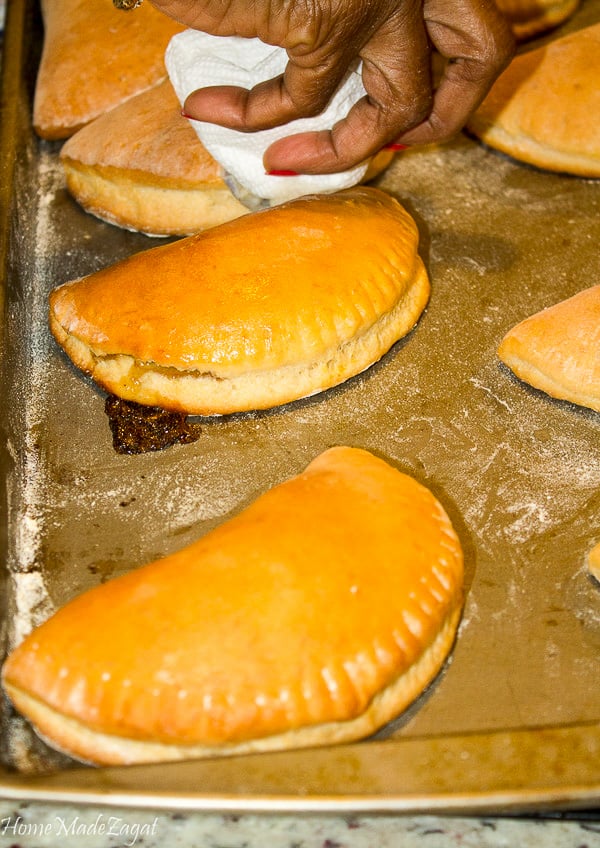
- Glaze the tarts: After 20 minutes, remove the tarts from the oven and brush the tops with a sugar glaze made with equal parts sugar and water. Return them to the oven and bake for another 5 minutes for a golden, lightly glazed finish.
- Cool (seriously, wait): The smell will test your patience, but let them cool on a wire rack. Hot coconut filling will humble you. Once cooled, bite in and enjoy the spice-filled magic.
Tips for the best coconut tarts
- Don’t leave the filling wet. Cook the coconut until tender and any added moisture has cooked out before filling the tarts.
- Don’t overfill the tarts. About 2 tablespoons of coconut filling is enough. Too much filling can cause the tarts to open while baking.
- Seal the edges well. Line up the edges of the dough evenly, press them together, then crimp securely with a fork.
- Let the dough rest. Give the dough the full resting time before rolling. This makes it easier to work with and shape.
Storage & Reheating
Let the coconut tarts cool completely, then store them in an airtight container or Ziploc bag at room temperature for up to 2 days. After that, move them to the refrigerator.
You can eat them straight from the fridge, but I prefer mine warmed up. Reheat them in a toaster oven, air fryer, or regular oven until warmed through.
More coconut treats to try:
If you’re loving that rich, spiced coconut filling, here are a few more Caribbean coconut bakes worth checking out:
- Sweet Bread – Our beloved coconut loaf, packed with flavor and perfect year-round.
- Coconut Bread Pudding – A soft, comforting twist on a classic.
- Coconut Drops – Chewy, spiced, and easy to whip up.
Looking for more traditional Caribbean sweets? Try:
Frequently Asked Questions
Yes, if fresh coconut isn’t available, unsweetened desiccated coconut works just fine. Just pulse it a few times in a food processor to break down the longer pieces, and add a little water while cooking to help soften it. Want tips on choosing a fresh coconut? I’ve got a full guide in this post on homemade coconut milk.
Store completely cooled coconut tarts in an airtight container at room temperature for up to 2 days, then move them to the refrigerator. Reheat them in the oven, toaster oven, or air fryer if you prefer them warm.
Absolutely. Once the tarts are fully cooled, wrap them tightly and freeze for up to 2 months. When you’re ready, let them thaw and reheat in the oven until warm and flaky again.
Ready to bake?
If you give this Trinidad coconut tart a try, I’d love to hear how it turned out! Leave a comment below or tag @thisbagogirl when you share your batch. I’m always here for a good coconut moment.
Recipe
Coconut Tart
Ingredients
Method
- Add the shredded coconut, sugar, ginger, nutmeg, vanilla, cinnamon, and bay leaf to a pan over medium heat. If using packaged coconut, add a small splash of water at the beginning to help soften the coconut as it cooks.
- Cook for about 15 minutes, stirring throughout, until the coconut is tender and the filling is no longer wet.
- Remove the bay leaf and set the filling aside.
- Combine the flour, sugar, and yeast in a large bowl. Add the Crisco and work it into the dry ingredients until well incorporated.
- Gradually add the water, along with the yellow food coloring if using, mixing until a smooth, soft dough forms.
- Form the dough into a ball, cover, and let rest for 30 minutes.
- Divide the dough into 16 roughly equal balls. Cover with a damp towel and let rest for another 20 minutes.
- Making the Tarts
- Preheat the oven to 350°F. Lightly grease a baking sheet.
- On a lightly floured surface, roll each dough ball into a circle, taking care not to roll the dough too thin.
- Place about 2 tablespoons of coconut filling on one half of each circle.
- Lightly dampen the edges of the dough with water. Fold the dough over the filling, line up the edges evenly, and press to seal. Crimp the edges securely with a fork.
- Repeat with the remaining dough and filling, then arrange the tarts on the prepared baking sheet.
- Bake for 20 minutes.
- Mix the sugar and water for the glaze. Remove the tarts from the oven and brush the tops with the glaze.
- Return the tarts to the oven and bake for another 5 minutes.
- Transfer to a wire rack and allow to cool before eating. Be careful, the coconut filling will be very hot.
Nutrition
Notes
- Fresh, dry coconut gives the best flavor, and one whole coconut usually yields about 4 cups shredded.
- If using packaged unsweetened coconut, pulse it briefly in a food processor to break up longer strands. Add a small splash of water when cooking to help soften it.
- Do not overfill the tarts. Too much filling can cause them to open while baking.
- Make sure the edges are lined up evenly and sealed well before crimping with a fork.
- Store completely cooled coconut tarts in an airtight container or Ziploc bag at room temperature for up to 2 days. After that, refrigerate them. Reheat in a toaster oven, air fryer, or regular oven until warmed through.
Recipe Printed From ThisBagoGirl.com

The only thing from this was to be able to bake it in a dirt oven. Very good recipe!!
Haha. I wish I had a little dirt oven lol. Thanks for the review!
Delicious
Thank you!!